Friday, October 28, 2016

Mallard Duck Costume

My 7 year old is fascinated by birds. All birds. He loves to go bird watching, and even has his own camera and binoculars. So when I asked him what he wanted to be for Halloween, I was not surprised to hear that he wanted to be a duck.  A Mallard Duck. (his favorite!) 
I was not entirely sure how I was going to pull that off, but I was determined to figure it out for him.  Here's what I came up with: brown shirt with a section of brown feather boa pinned down the sleeves, grey pants,  a yellow foam visor for the beak covered with a green beanie cap with self-adhesive eyes, and cut-out felt duck feet to cover his shoes.You have never seen a happier duck, anywhere! 
Mallard Duck Halloween

Duck for Halloween costume

Mallard duck costume

Thursday, October 27, 2016

If You Give a Mouse a Cookie Costume

My 4 year old loves books and one of his favorite's is If You Give a Mouse a Cookie... so of course this year for Halloween he wanted to go as the Cookie Mouse. Sounded pretty easy; overalls, a gray shirt, mouse ears and tail, and of course the monstrous-for-a-mouse-sized cookie. The only thing that really took much effort was the cookie, which I stitched together out of felt, stuffed and made a strap for him so his hands could be free to do other things.
Lookin' good, Cookie Mouse, let's go find you some milk! :)

"If You Give a Mouse a Cookie" mouse costume

Cookie Mouse costume

Tuesday, October 18, 2016

October 2016 General Conference Quotes

 Here are some of my favorite quotes from the most recent General Conference. :)

2016 General Conference quote

Click HERE to print

"Don't Give Up" printable quote

Click HERE to print

Dieter F Uchtdorf printable quote

Click HERE to Print

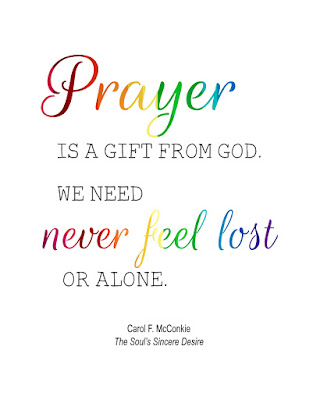
Printable quote about prayer

Click HERE to print

M Russell Ballard quotes

Click HERE to print

David A Bednar quote

Click HERE to print

Thursday, October 13, 2016

Easy Fabric Pumpkins (with attached leaves!)

fabric pumpkin

If you are ready for some simple sewing this project is for you! If you can sew straight lines, you can sew this pumpkin. 


 I started out with some fabric quarters. I found two that I liked together and squared them up. I saved the extra fabric for future projects.


Match up our squares, with the right sides facing each other. Stitch around the edge (leaving a small hole to turn it right side out later).


Before turning the fabric, snip off your corners. It will help them lay flatter once it has been turned and ironed.


Here's what it  should look like. Give it a good press with the iron and then stitch it again around the edge, right sides out. The gap will close with this step.


With the orange side up (very important!) , fold in each corner.


Pin each corner and stitch down. You are creating a channel for the string to pass though. 


Thread your jute/string though the holes.  Flip it over and gently pull the strings tight. 
I used plastic shopping bags as a filling. Tie it off.


It should look like this when you are done. You can stuff the excess string inside, out of sight, or you can pull a little bit out and tie a bow, or add a small stick for a stem like I did.

fabric pumpkin for Fall

Enjoy your cute little pumpkin! 

Tuesday, October 11, 2016

Harry Potter Quote Printables

When our oldest sons started reading Harry Potter I made them wait a little bit of time before reading the next book, to make sure they were ready for the intensity and maturity that builds as the series progresses. (And, if I'm being honest, because I've got really good readers and I wasn't sure my 2nd and 3rd grade kids could handle books 6 and 7 yet.)  We watched each movie together as they finished each book, so that gave us something to look forward to, also. It was a good system. However, when our only daughter started reading them last year, she quickly became the biggest fan in our house and, try as I might, there was no holding her back. She quickly devoured the series and has gone back many, many times to reread them again. She frequently quotes from the books and has almost worn out our copies to the point that I will need to replace them soon. (The boys complain that I spoil her, because I let her read them at a quicker pace...perhaps, but there's just no squashing her enthusiasm for the books!) It's almost Halloween, and of course she has her Hermione costume ready.  To make my not-so-little-girl happy, I made her some printables. (I'll share with you too!)
Harry Potter printables
Harry Potter I solemnly swear printable

click HERE to print

Albus Dumbledore printable quote

click HERE to print

"...pursue that flighty temptress, adventure." quote from Harry Potter

click HERE to print

Albus Dumbledore quote

click HERE to print

Saturday, October 8, 2016

"My Gospel Standards" Printable Poster with Attachable Cards

"My Gospel Standards" LDS Primary poster

My sister was recently called as the Primary President in her ward. They have been reviewing the My Gospel Standards poster each Sunday as part of sharing time. She wants to discuss one standard each month, and she needed something that was very hands on so the kids could participate more fully.  She enlisted my help and I designed this poster for her. Each month the kids can attach one of the standards over the temple square on the larger poster. When they are all done the complete poster will list all the standards.

First we did our homework and found out what was the largest size poster we could reasonably have printed. We found that Staples can print things on engineer sized paper or large-format sized, which is 24x36 inches. Perfect. I formatted the design to fit. Then I figured out based on the design of the large poster, how big each little card needed to be. Each standard card is 5.25 x 7in, which is kind of an off size, but since we printed the cards at home on card stock (cheaper than having Staples print them) I just cut some card stock to that size and ran it through my printer.

We had Staples laminate the large poster, but since we printed the smaller cards ourselves we used their home laminator on those. Technically, you wouldn't have to laminate any of them, but it makes it a bit more durable and since little kids will be handling them all year, it was a good investment. (In case you are wondering it cost about $25 to print and laminate the large poster. The smaller cards only cost us the price of the paper and ink, and the laminating materials, which we already had.)

Here's the files if you want to print your own! You're Welcome! 

My Gospel Standards poster (24x36 in)
My Gospel Standards cards (5.25 x7in)

Wednesday, October 5, 2016

Host an Ornament Exchange Party...3 Ways!

Ornament Exchange Party instructions

One of my favorite things to do every year is to look at all the ornaments in our collection and remember where I was and what we were doing when we received each one. It's like opening a little time capsule every December! If you are like me, and you have a love for ornaments, you may want to consider hosting an Ornament Exchange.

You may be looking at the date of this post and thinking, "Why are you talking about Christmas in October? I've got plenty of time..." But planning a party takes a little bit of time and preparation, and now is the time to get started, especially if you want to host a homemade ornament exchange.

One of the most important steps is to pick a date. I usually recommend early December or late November since the end of year gets really busy with parties and school events. Once you have a date selected, you need to decide what type of ornament exchange you'd like to host.

1. STORE-BOUGHT ORNAMENT EXCHANGE

Invite your friends and ask them each to bring an ornament to exchange. You might specify a certain theme (like a snowman, nativity, or red/green theme). It might also be a good idea to set a reasonable price limit so that somebody doesn't bring a really expensive ornament and leave with a dollar store special.

The actual exchange can be done several ways. They can be exchanged white-elephant style, OR you can have each guest draw a number and then pick an ornament in the order they drew.

TIP: You might consider asking your guests wrap the ornaments before arriving and exchange them sight-unseen. Just like your friends' personalities, all ornaments are very different. What one person finds beautiful, another finds tacky. Hopefully your guests are mature enough to be gracious, but it only takes one thoughtless remark to cause hurt feelings. No one wants to have brought the ornament that nobody seems to want, and as host, you don't want any of your guests to be offended. Exchanging and having just one reveal of all the ornaments at the end, can avoid a lot of hurt feelings.

2. HOMEMADE  ORNAMENT EXCHANGE

Follow the same guidelines as above, but ask that each guest bring a homemade ornament. Personally, I prefer the homemade ornaments, as they have a little more personality and every year as you place the ornament on your tree you will be reminded of the person who made it. It can be a great way to remember loved ones.

3. MEGA-HOMEMADE ORNAMENT EXCHANGE 

This method takes a bit more preparation, but in my opinion, it is so worth the effort! Basically, instead of only bringing one ornament to exchange, each guest will bring one for each person attending the party. You will need to start your prep work a few months in advance, like in September or October to give each person enough time to gather materials and craft their ornaments.
First, consider how many people you want to invite. 10-15 people (or less) is probably a pretty good number, since it can get really expensive and time-consuming to make the ornaments.

One easy way to do this is to send out an "are-you-interested-in-participating?" e-vite with details and ask your friends to commit via their response. You really can't have any maybes, because you need a final head count so you know how many ornaments to tell each guest to make and bring, so set a need-to-know-by date on the e-vite. Once you have your final head count, send out another invite to just those who are participating with the final details.

I really like hand delivering the "official" invitation, it is more personal and friendly that way. I even made a small personalized ornament to give with the invitation, too! (It was so fun!)

Be sure to plan on food/snacks, good music and decor. Luckily, if you've already decorated your home for the holidays, you're all set! The night of the party, exchange and enjoy. I usually have each guest show their hand-made creation and tell us how they made it. Also, be sure to have empty gift bags available for each guest to take their newly-acquired ornaments home.

TIP: If you're like me and you really can't bear to leave anyone out, go ahead and invite as many people as you want, but then just assign a number of ornaments to each guest. I once hosted a party with over 30 guests, but asked each friend to bring just 10. Unfortunately, not every guest will get to leave with every ornament, but they did receive 10 new ones, which was still good! I just purchased gift bags and randomly selected 10 ornaments for each bag, and then randomly gave the bags out. Some trading of ornaments occurred among a few of the guests, so they could get their favorites from the night, but at that point it was out of my hands, and nobody had to "bid" on any of the ornaments.

If you want to see some ornaments from parties past check out these posts:

Saturday, October 1, 2016

Free October Printable and Recipe

Like Anne, I too, am so glad I love in a world where there are Octobers! October is the very best of all the senses; the richly colored, crunchy leaves, the smell of pumpkins, apples and cinnamon, the warm fuzzy sweaters on chilly days, the taste of hot cocoa.
In honor of October I am sharing a few of my favorite October-y things... this printable quote from one of my all time favorite books, and my pumpkin bread recipe. Now  your house can smell like October, too! Happy Fall!
Anne of Green Gables "October" quote
Click HERE to print

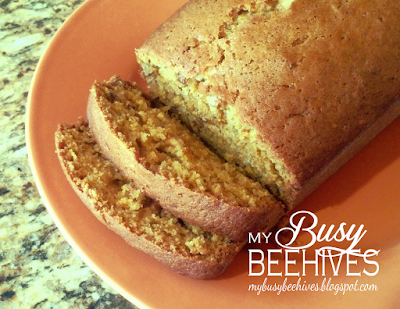
pumpkin bread

Every Fall, my mom used to make this pumpkin bread recipe for our family. Even now, the smell of it reminds me of the season, and of her. Enjoy!

Pumpkin Bread

Mix the wet ingredients:
1 cup oil
2/3 cup water
4 eggs
2 cups pumpkin puree
3/4 cup chopped walnuts (optional)

To the wet ingredients, mix in the following dry ingredients:

1 1/2 tsp salt
1 tsp nutmeg
1 1/2 tsp baking soda
1 tsp cinnamon
3 cups sugar
3 1/2 cups flour

Divide mixture into 3 greased and floured loaf pans. Bake at 350 degrees for approximately one hour, or until toothpick comes out clean.